Track Lights
 Linear Lights
 Track System
 Decorative Lights
 Recessed Light
 Pendant lights
 Surface mounted lights
 Panel lights
 Street Lighting
 Magnetic Lighting System 48V
 Magnetic Lighting System 48V
 Invertors
 Lighting control
How to choose track spotlights: 9 tips
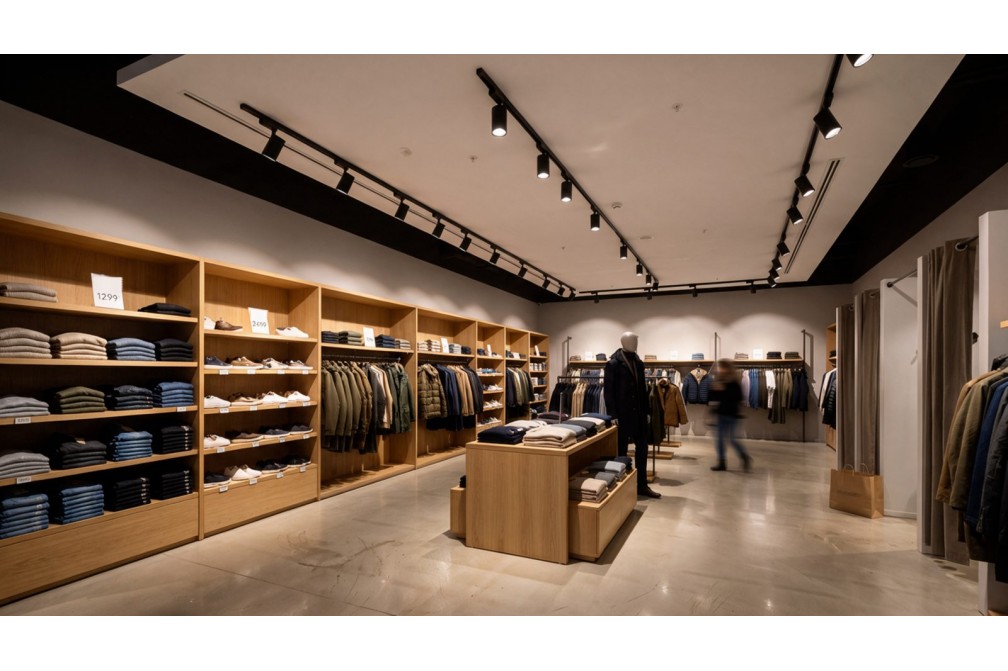
Track spotlights are bought from catalogue photos but judged in the store: can you see the goods on the bottom shelves, does the light dazzle shoppers at the checkout, does the meat look grey. Most mistakes can be spotted before the order is placed if you know what to look for. Below are nine practical tips, tested in retail projects, with numbers you can put straight into your plan.
1. Start with the merchandise, not the spotlight
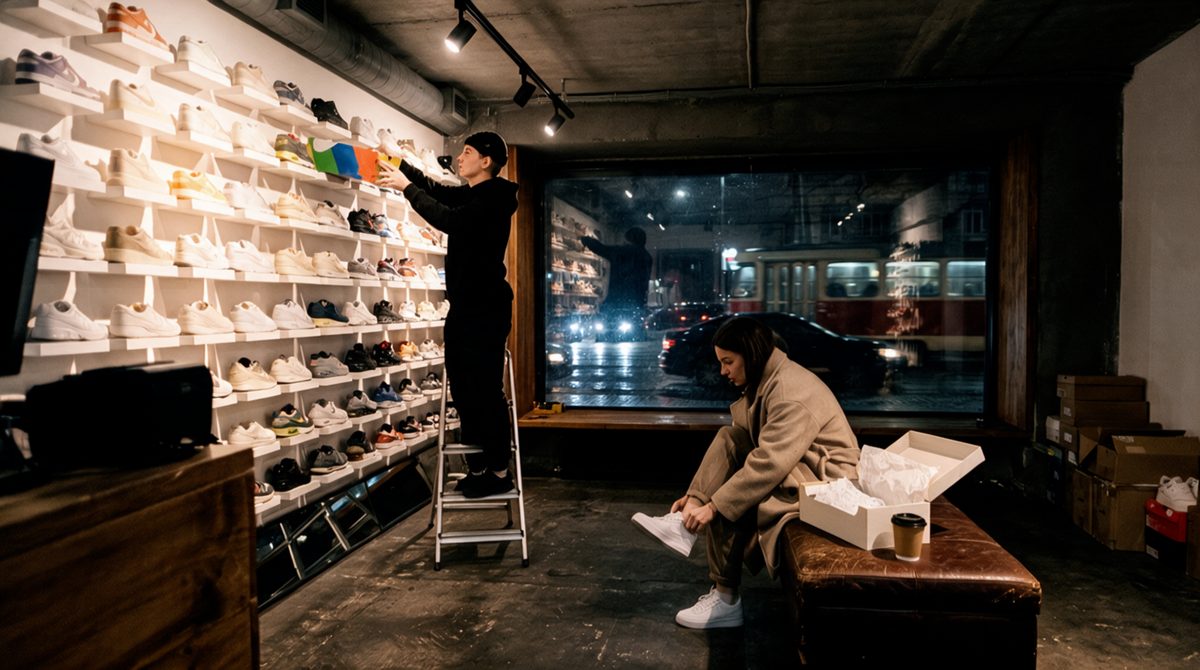
The first question is not "which spotlight" but "what exactly must stand out". For each zone, write down what is displayed there and how the shopper looks at it: a wall of shoes, an island table, a meat counter, a wine rack.
Accent light only works in contrast with general light. The Illuminating Engineering Society (IES) gives reference points: a 2 : 1 ratio between accent and background is already noticeable, 5 : 1 gives a soft dramatic effect, 15 : 1 a strong one. A grocery store usually needs 2–3 : 1, clothing and footwear 3–5 : 1, a boutique or showroom 5 : 1 or more.
2. Match the beam angle to the distance
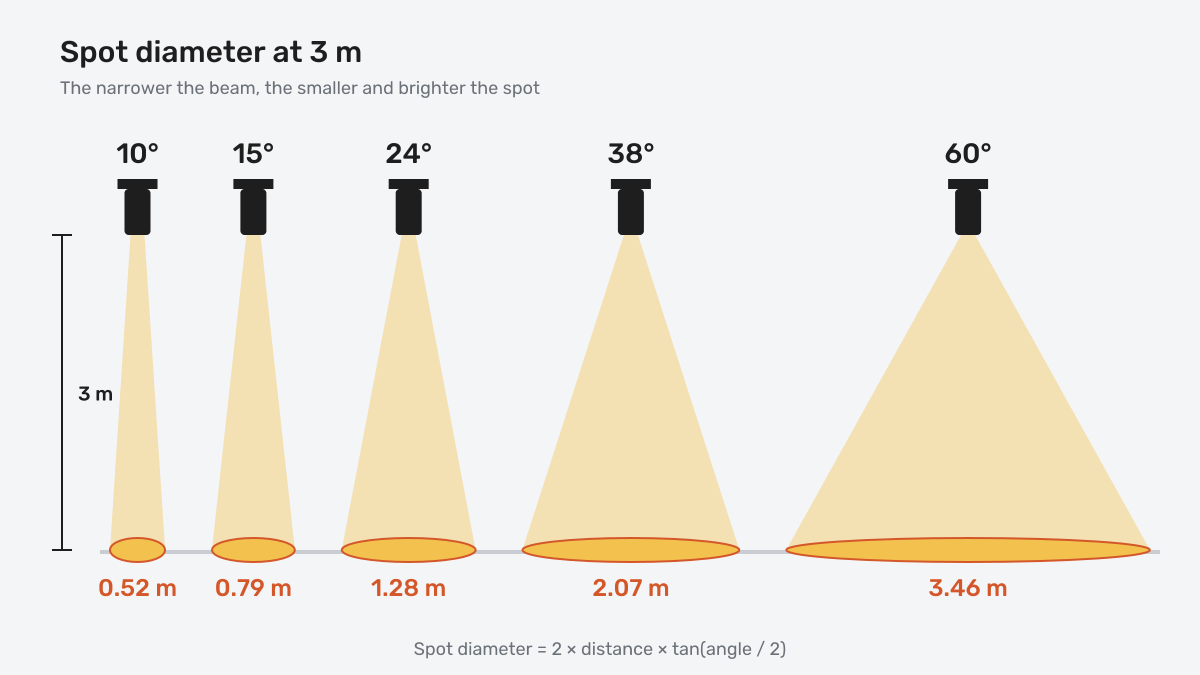
The beam angle defines the spot of light the spotlight puts on the merchandise. Catalogue beam angles are measured at half of the peak luminous intensity, so the real spot is slightly wider, but this estimate is enough for selection.
Spot diameter by beam angle and distance from the spotlight to the merchandise:
| Distance to merchandise | 10° | 15° | 24° | 38° | 60° |
|---|---|---|---|---|---|
| 2 m | 0.35 m | 0.53 m | 0.85 m | 1.38 m | 2.31 m |
| 3 m | 0.52 m | 0.79 m | 1.28 m | 2.07 m | 3.46 m |
| 4 m | 0.70 m | 1.05 m | 1.70 m | 2.75 m | 4.62 m |
| 5 m | 0.87 m | 1.32 m | 2.13 m | 3.44 m | 5.77 m |
Rule of thumb:
- 10–15° for a single item: a mannequin, a bottle on a podium shelf, a watch display;
- 24° to accent a section of shelving or a table;
- 38° for even light on a merchandise wall;
- 60° for washing large surfaces and low ceilings.
A narrow beam at a short distance gives a small bright spot and dark gaps. A wide beam from a great height spills light across the floor.
3. Tilt the spotlight no more than 15° and keep the right track distance from the shelving
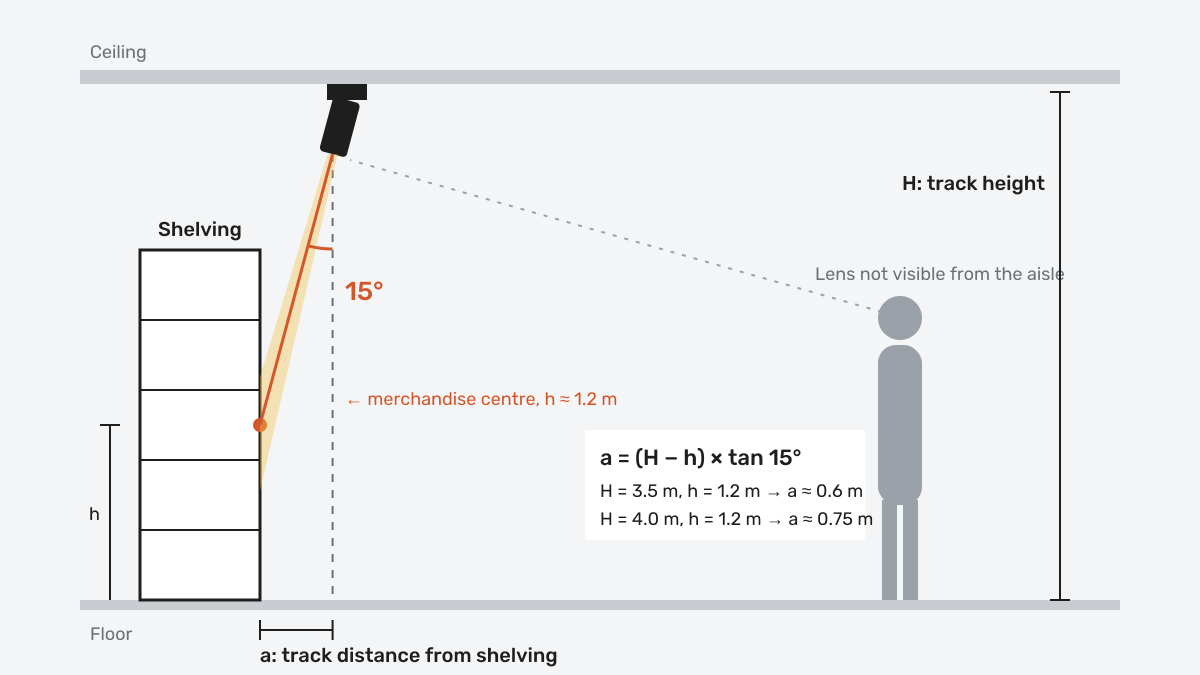
A spotlight tilted towards the shelving by no more than 15° from vertical lights the face of the merchandise, while the lens stays inside the housing and out of shoppers' eyes. At a steeper tilt, someone walking down the aisle or standing at the opposite shelving sees a bright lens and is dazzled. A 30° angle from vertical is the gold standard for museums and galleries, where the viewer stands in front of the exhibit. In a store, shoppers move along the aisles, so the tilt is limited to 15°.
That is why the track is mounted close to the shelving. Distance from the shelf face: track height minus the height of the merchandise centre, multiplied by tan 15° (about 0.27).
| Track mounting height | Merchandise centre 1.2 m | Merchandise centre 1.5 m |
|---|---|---|
| 3.0 m | 0.48 m | 0.40 m |
| 3.5 m | 0.62 m | 0.54 m |
| 4.0 m | 0.75 m | 0.67 m |
| 5.0 m | 1.02 m | 0.94 m |
The most common mistake in stores is running the track along the centre of the aisle because it is easier. The spotlights then hit the shelving at a steep angle, and shoppers see bright lenses instead of the merchandise.
4. Calculate the spacing between spotlights
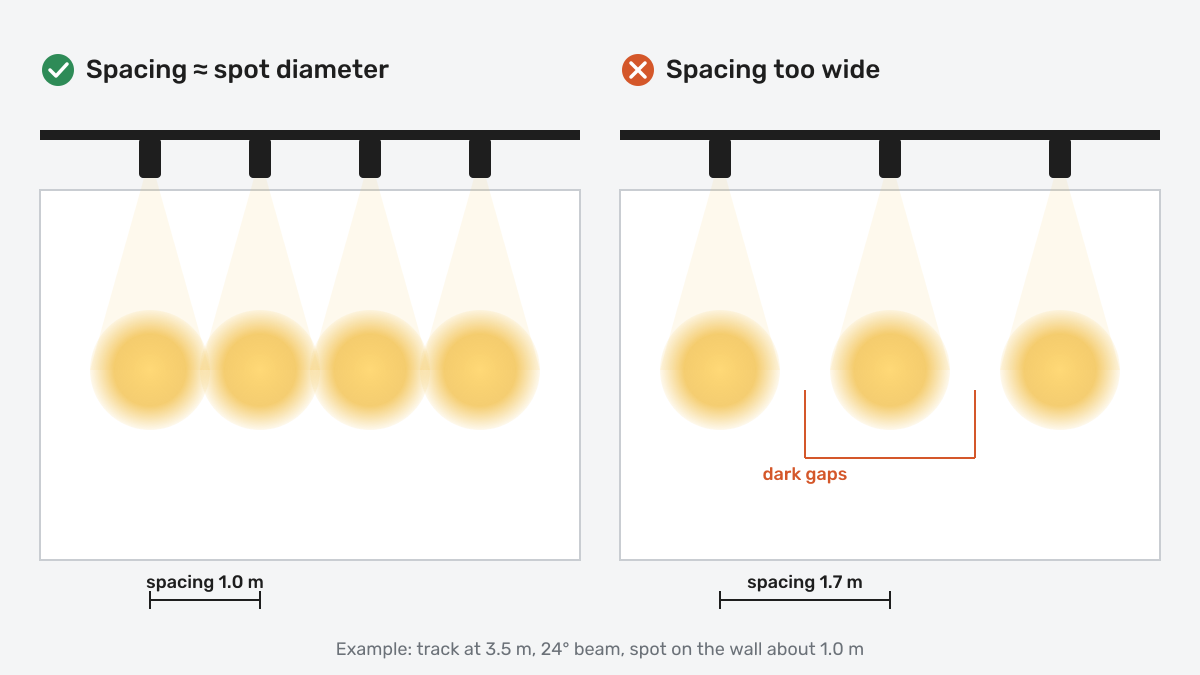
For even light on a wall, the spots from neighbouring spotlights should touch or overlap slightly. As a guide, the spacing between spotlights is roughly equal to the spot diameter on the merchandise.
Example: track at 3.5 m, about 2.4 m from spotlight to merchandise, 24° beam. The spot is about 1.0 m, so the spacing is 0.9–1.1 m. With a 38° beam under the same conditions, the spacing can be increased to 1.5–1.7 m, but the accent will be softer.
For island tables and individual mannequins spacing does not matter: each spotlight is aimed at its own object.
5. Choose colour temperature and CRI for the merchandise
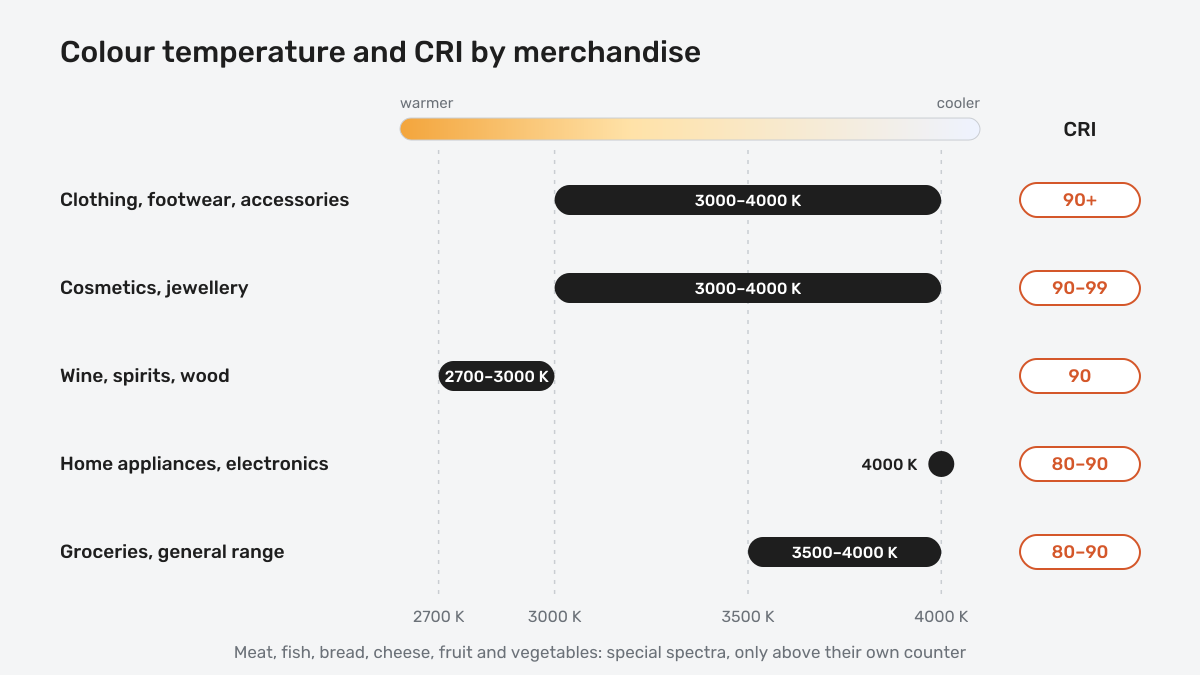
Colour temperature sets the mood, and the colour rendering index (CRI, Ra) shows how natural the colours look.
| Merchandise | Colour temperature | CRI |
|---|---|---|
| Clothing, footwear, accessories | 3000–4000 K | 90 and above |
| Cosmetics, jewellery | 3000–4000 K | 90–99 |
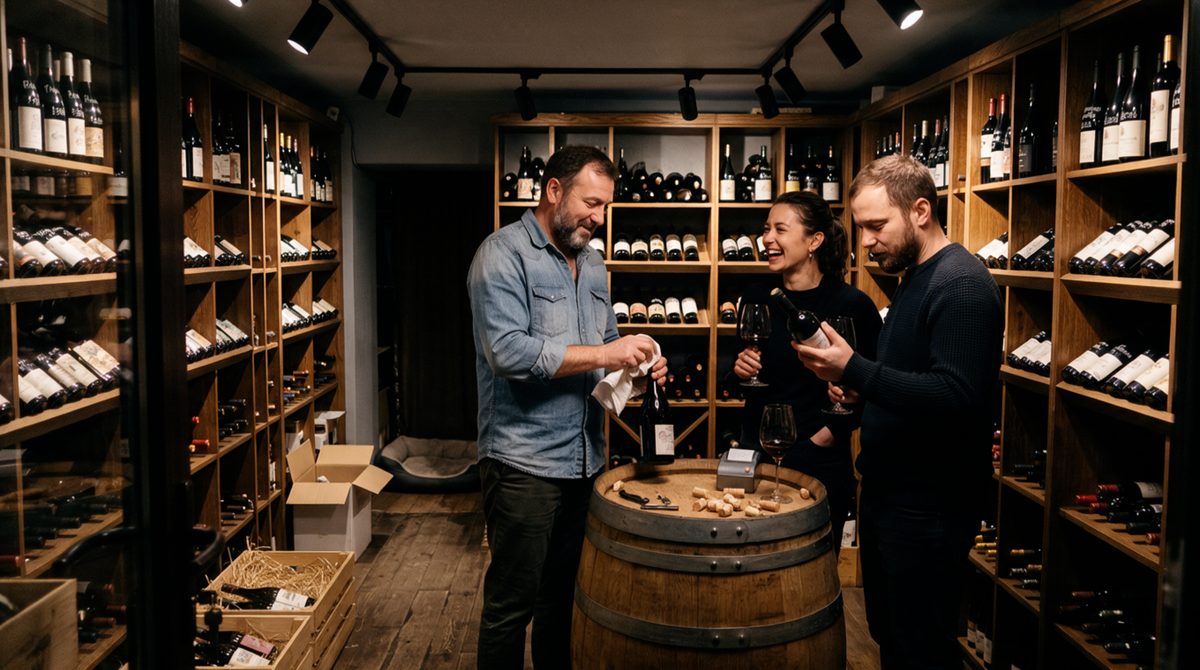
| Wine, spirits, wood | 2700–3000 K | 90 |
| Home appliances, electronics | 4000 K | 80–90 |
| General grocery range | 3500–4000 K | 80–90 |
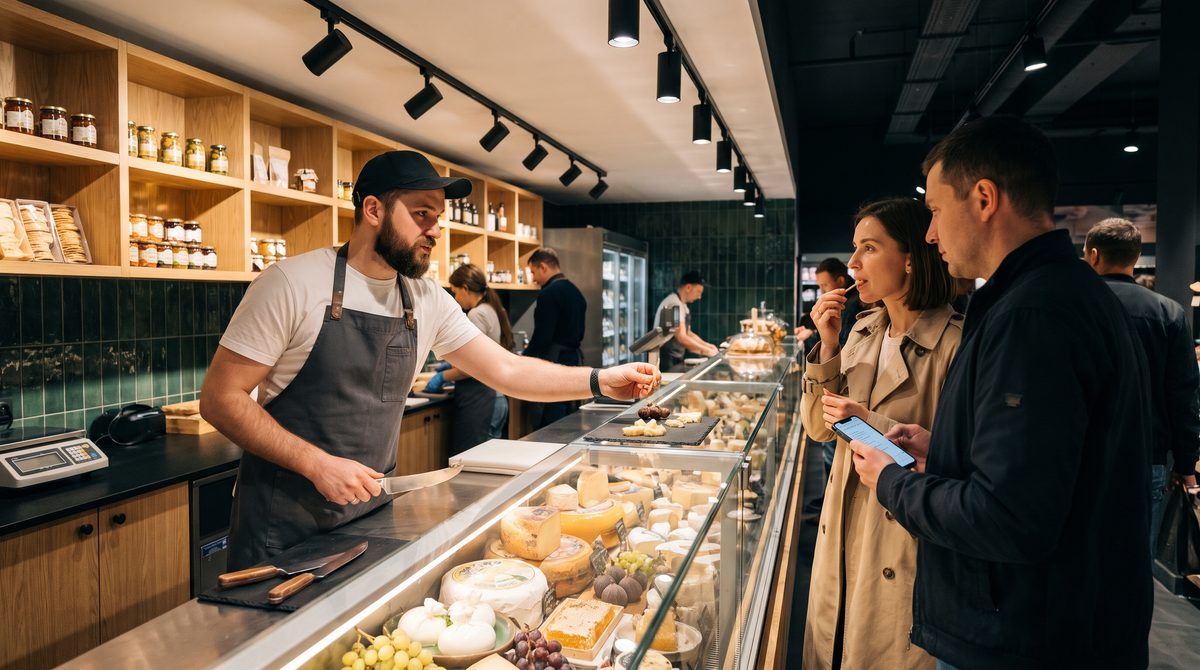
For fresh food there are special spectra: red meat, marbled meat, fish, bread, cheese, fruit and vegetables. They enhance the colours of these specific products and are used only above the matching counter. A meat spectrum above vegetables or clothing will distort colours.
6. Add an anti-glare honeycomb where shoppers look up
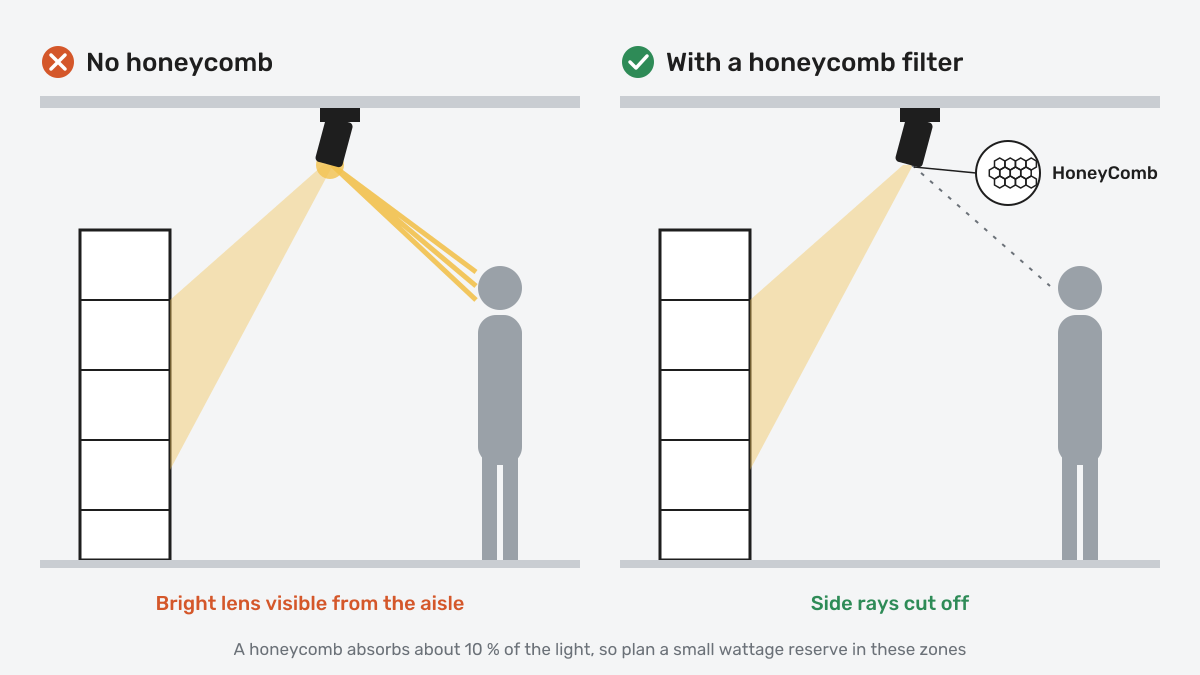
At the checkout, in a café, in a food court or near the fitting rooms, people raise their eyes and see the spotlight lens. A honeycomb filter cuts off the side rays and removes glare.
A honeycomb absorbs part of the light, about 10 %, so in these zones the wattage is planned with a small reserve. Above shelving in the aisles, where the lens is only seen from the side, a honeycomb is usually not needed.
7. Spotlight size depends on height and task
A larger housing is not about looks: it has a bigger heat sink and can take a more powerful LED module without overheating. A guide to our series:
- SHOOTER-S: low ceilings, display cases, local accents, cafés;
- SHOOTER-M: the all-round choice for clothing, footwear and grocery stores with ceilings up to 3 m;
- SHOOTER-L: supermarkets and tall halls with up to 4 m to the merchandise;
- TRACER: compact accents with narrow beams;
- PRIAGO: a classic housing for HoReCa and boutiques.
It is better to build one hall on one or two series. Replacements are easier to buy and the ceiling looks tidy.
8. Decide on the track and control system in advance
A single-circuit track is cheaper, but all spotlights on it switch together. The three-circuit TRACK-3F track has three independent circuits: on one profile you can separate, for example, display cases, general light and night mode. More on the difference in the article "Single-phase or three-phase track for a store".
If you need smooth dimming and scenes, specify DALI adapters from the start. Converting an installed hall to DALI costs more than planning it in the project.
9. Check the solution with a calculation, not by eye
Spotlights of the same wattage can give different illuminance on the merchandise because of their optics. Compare options with a calculation: lux on the shelf face, uniformity, installed power in W/m².
The calculation includes a maintenance factor: LEDs dim over time, so the system is designed with a reserve to keep the required light level on the shelf after several years.
Common mistakes
- Track along the aisle centre instead of parallel to the shelving at the calculated distance.
- The same beam angle for the whole hall, with no difference between wall, table and mannequin.
- Spotlights with different colour temperatures in one zone.
- Fresh-food spectra above merchandise they are not designed for.
- No honeycomb in the café and at the checkout.
- No aiming after installation: spotlights must be aimed at the merchandise after it is displayed.
Quick selection algorithm
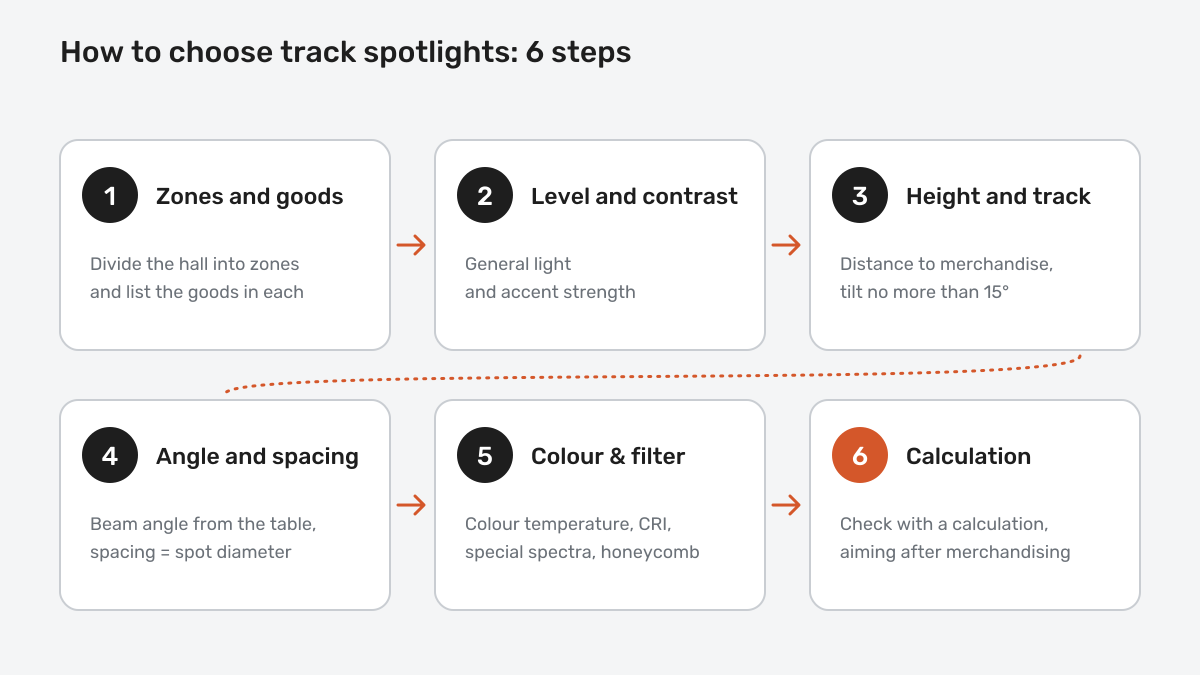
- Divide the hall into zones and list the merchandise in each.
- Set the general light level and the accent contrast.
- Define the track height and the distance to the merchandise, and place the track so the spotlight tilt is no more than 15°.
- Choose the beam angle from the table and the spacing from the spot diameter.
- Choose colour temperature, CRI, special spectra and where a honeycomb is needed.
- Check everything with a calculation and aim the spotlights at the merchandise after installation.
How we select spotlights at Vision Lighting
We manufacture track spotlights SHOOTER-S, SHOOTER-M, SHOOTER-L, TRACER and PRIAGO with beam angles of 3°, 10°, 13°, 15°, 24°, 38°, 45°, 54° and 60° (the set depends on the series), CRI 80, 90 and 99, special spectra for fresh food and a honeycomb filter. For every project we run a lighting calculation by zone and select beam angles and track layout for the shelving and ceiling height. You can put together a track and spotlights in the online configurator, or send us your floor plan and we will propose a solution for your merchandise.
FAQ
Which beam angle should I choose for a clothing store?
For clothing walls with a 3–3.5 m ceiling, 24° or 38° is usually used; for mannequins and tables, 15–24°. The exact angle depends on the distance from the spotlight to the merchandise: see the spot diameter table above.
How far from the shelving should the track be mounted?
So that the spotlight tilt towards the merchandise centre is no more than 15° from vertical. With the track at 3.5 m and the merchandise centre at 1.2 m, this is about 0.6 m from the shelf face.
How many spotlights are needed per metre of wall?
The spacing roughly equals the spot diameter on the merchandise. For a 24° beam at about 2.4 m, this is one spotlight per 0.9–1.1 m of wall.
Why CRI 90 or 99 if CRI 80 is cheaper?
CRI 80 is enough for general light and technical areas. For clothing, cosmetics and fresh food, CRI 90 and above renders shades noticeably more accurately, and the products look the same as they will at the shopper's home.
Do all spotlights need a honeycomb?
No. A honeycomb is needed where shoppers can look straight into the lens: checkouts, cafés, fitting rooms, low ceilings. It is usually not used above shelving in the aisles because it absorbs part of the light.
Sources: IES Lighting Handbook (accent to general light ratios); SHOOTER, TRACER and PRIAGO series data: visionlighting.ua catalogue.